Steps
- From the Dashboard, click the green 'Edit Map Layout' button located on the upper right hand side of the page.

- Click a booth to begin editing the booth, or click "Drawing Tools" to create a booth if you need to make a new one!
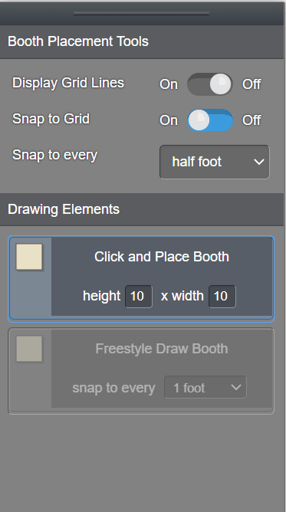
- Under Drawing Elements in the sidebar to the left, you'll see 2 options:
- "Click and Place Booth" Default booth size is 10 x 10 feet, but you can also specify a size by clicking into the height and width fields and entering new values!
- "Freestyle Draw Booth" Allows you to create your own booth of any size by clicking and dragging on the map.

- Click one of these buttons, then click on the map to begin placing booths.
- Once you've finished placing the booths, click on the button under "Drawing Elements" again to deselect the booth placement function.
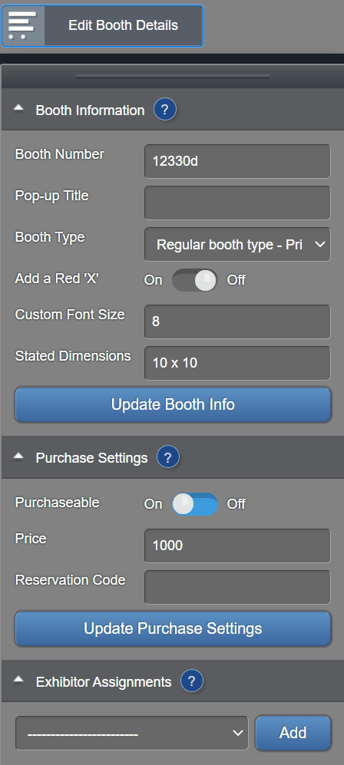
- Now you can click on a booth using either the "Edit Booth Details" or "Drawing Tools" toolboxes to alter the booth or assign / un-assign exhibitors, assign a booth type, create a registration code, etc. Click here for additional information on editing booth details.

- Click the green Save Map Layout Changes button at the top of the screen when you're done!

Edit a booth's physical properties
- Click on a booth.
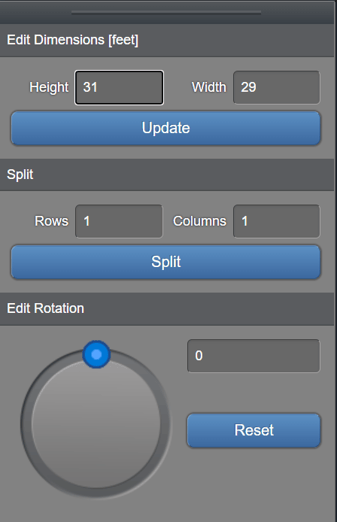
- Click the "Drawing Tools" button.
- Change the field values for the property you wish to update. (To rotate the booth, use the rotation wheel instead.)
- Click the "Update" or "Split" button if you're changing size or creating columns / rows.
- Click "Save Map Layout Changes".
Delete booths
- Click on a booth.
- Press the "Delete" or "Backspace" key on your keyboard.
Notes
- Enable Snap to grid or Turn grid on if you're having trouble aligning your booths.
- Use the arrows on your keyboard to move your booths on the map more finely.
- Select a booth and hit the "Delete" or "Backspace" key to delete a booth.
-
You cannot export a hi-resolution image of the map.

